
Tag Reports Features
LiveAgent's Tag Reports enhance support workflows by using tags to categorize tickets and create custom reports. Features include call tagging, customizable but...
4 min read
Tag Reports
Reporting
+2


Tags in LiveAgent help organize help desk tickets, enhancing agent efficiency and response times, leading to better customer satisfaction and revenue. They can be added manually or automatically, and used in automation rules and reports.
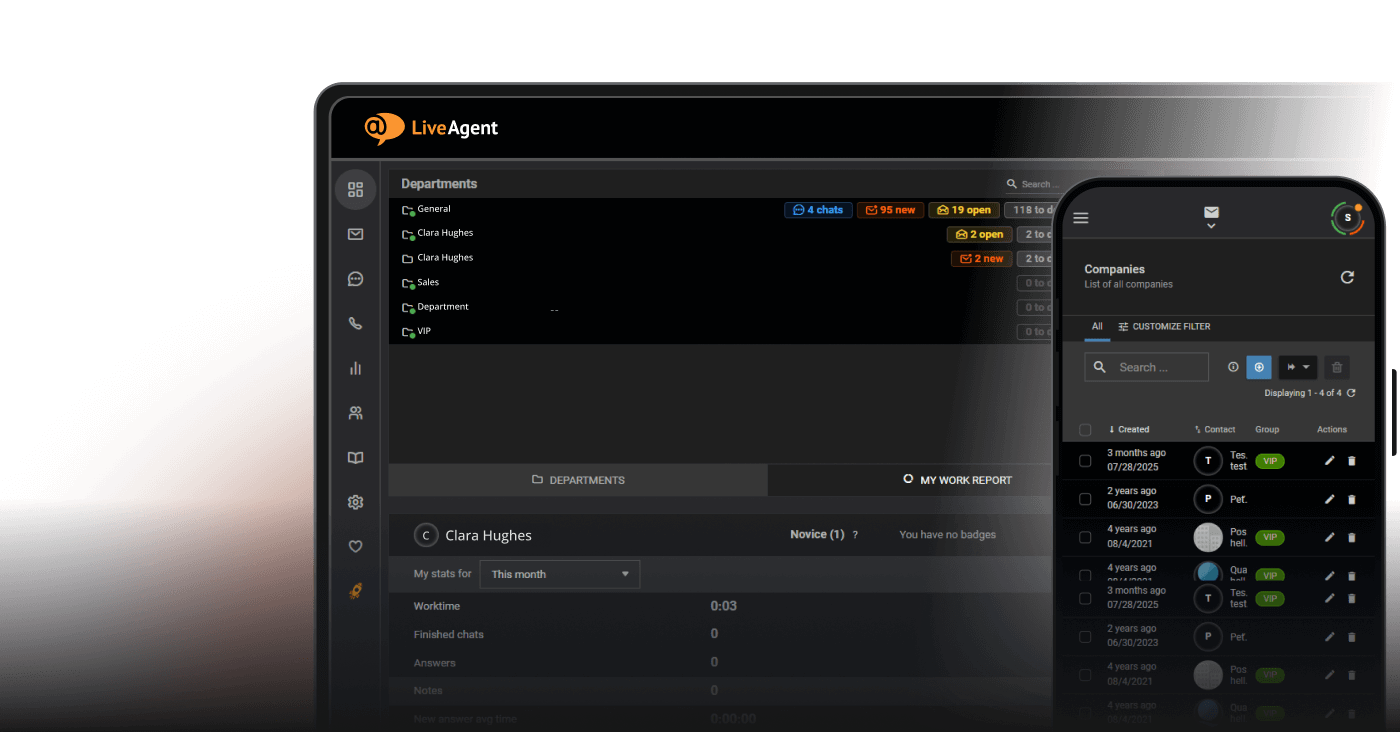
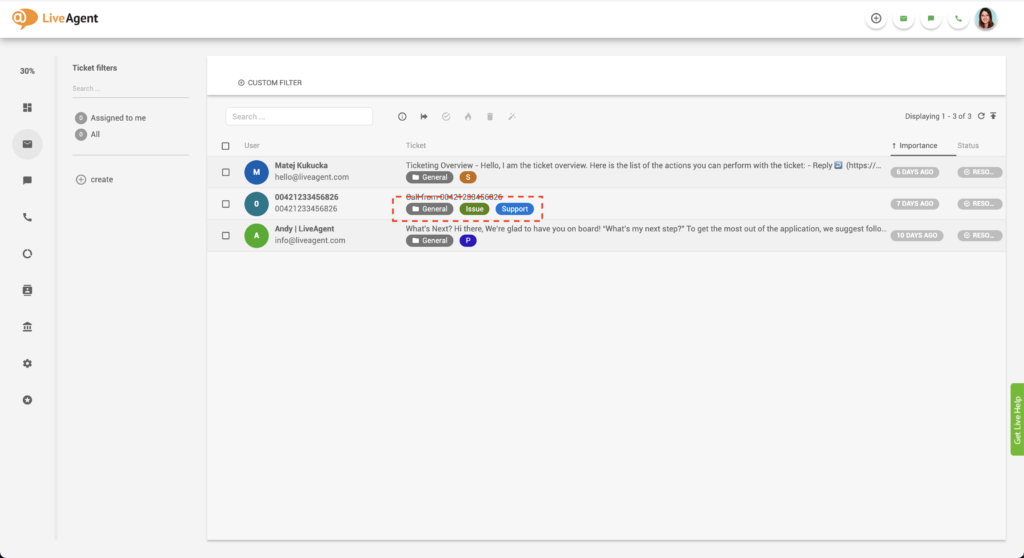
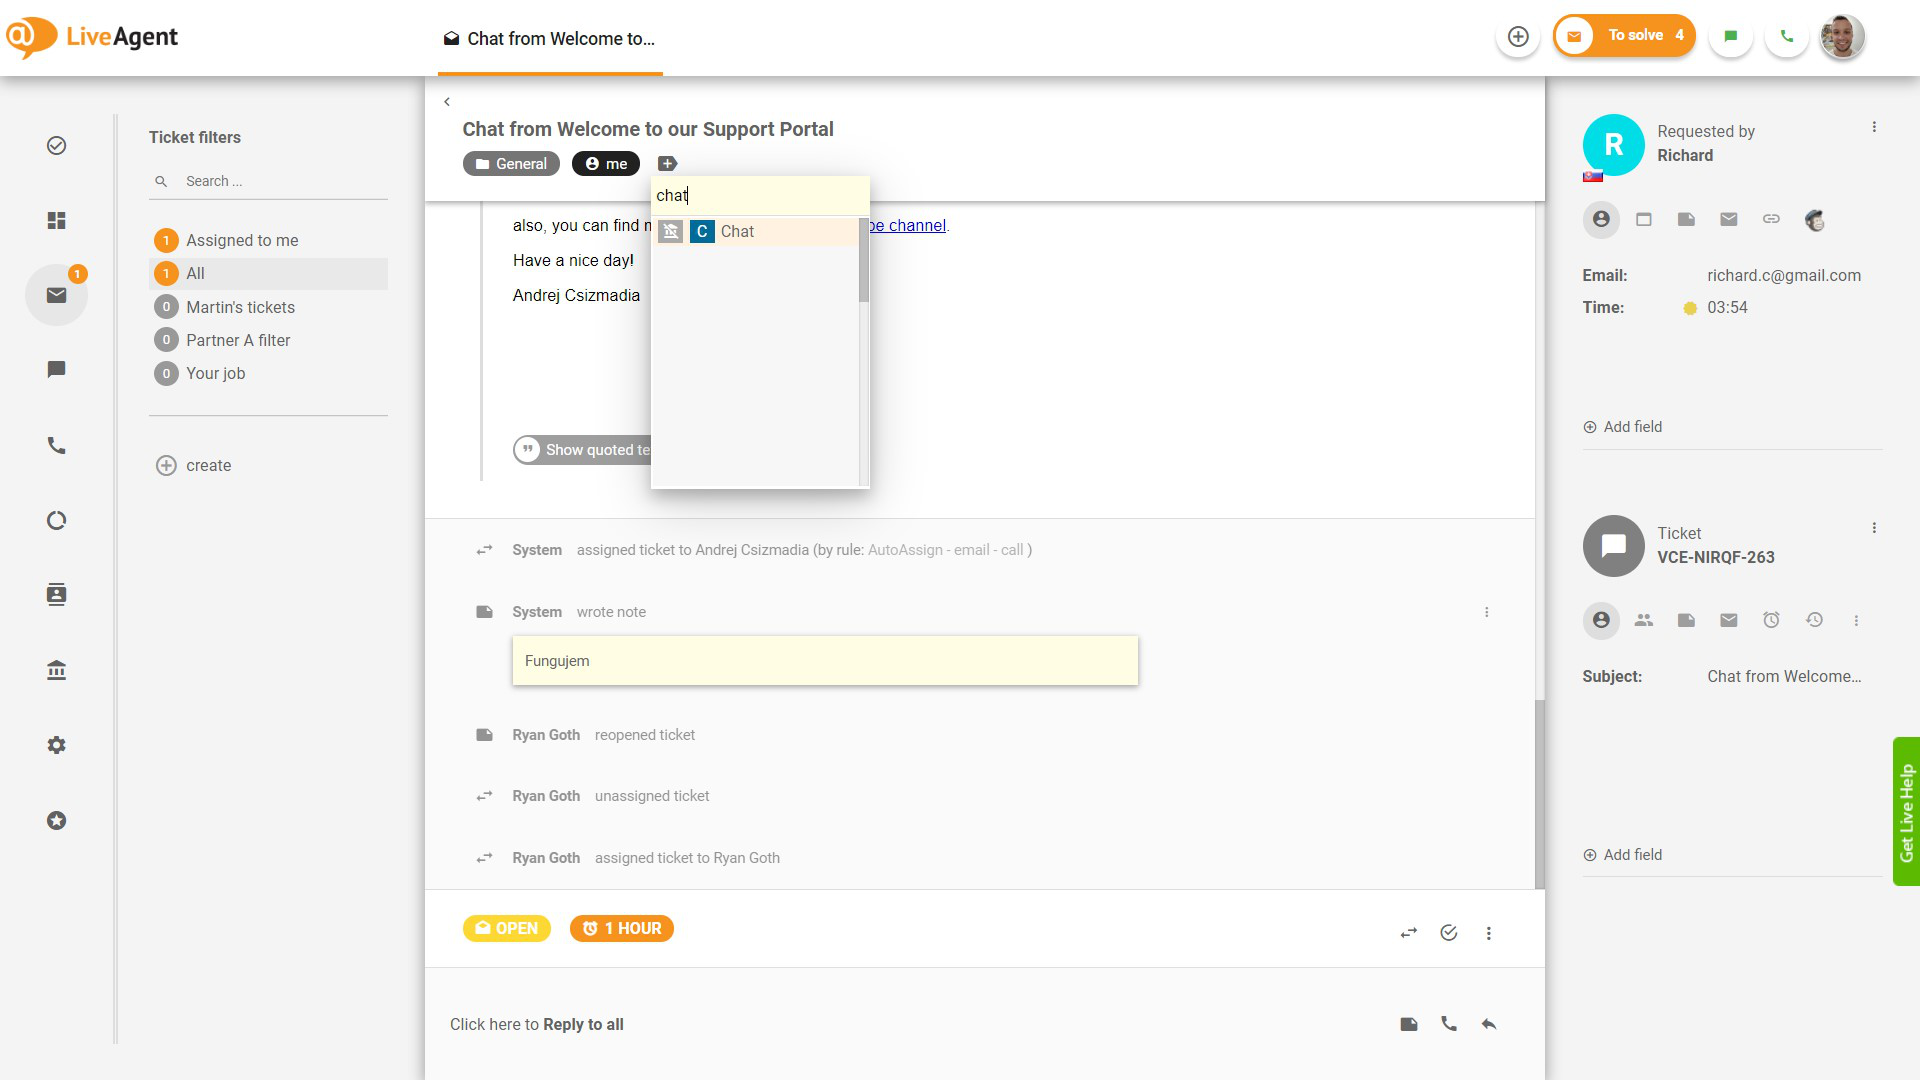
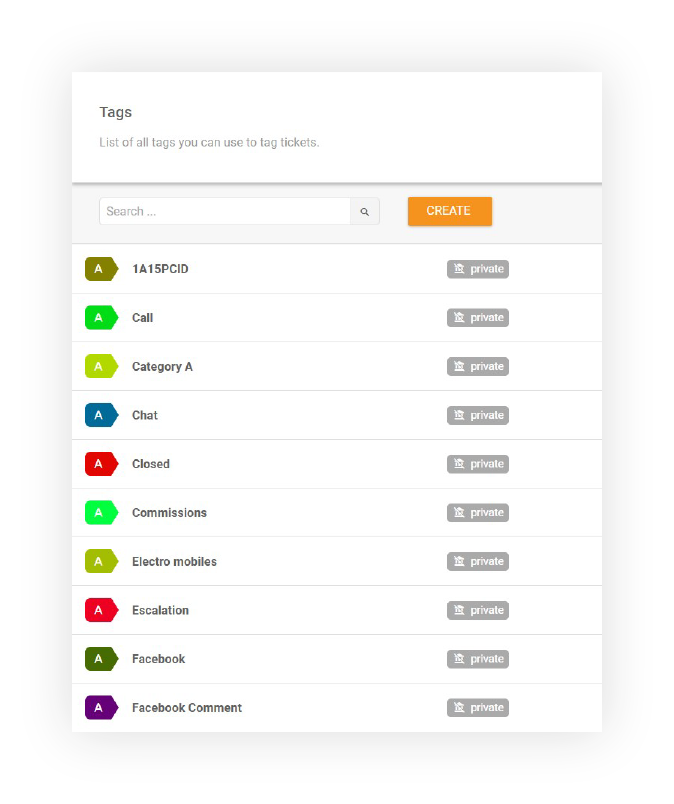
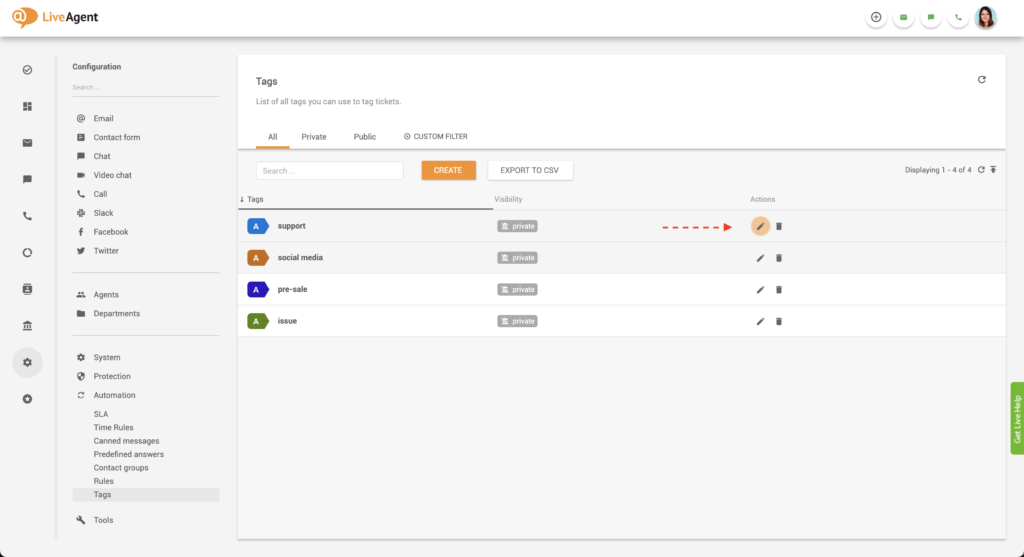
Tags can be defined as labels that are attached to help desk tickets. They are primarily used in the ticketing tool to organize and categorize tickets, but can also offer a preview of the ticket’s contents at a glance. Generally, tags are considered as one of the key features of help desk ticketing tool because they can help you differentiate between different customer segments and support topics in a quick and easy way.
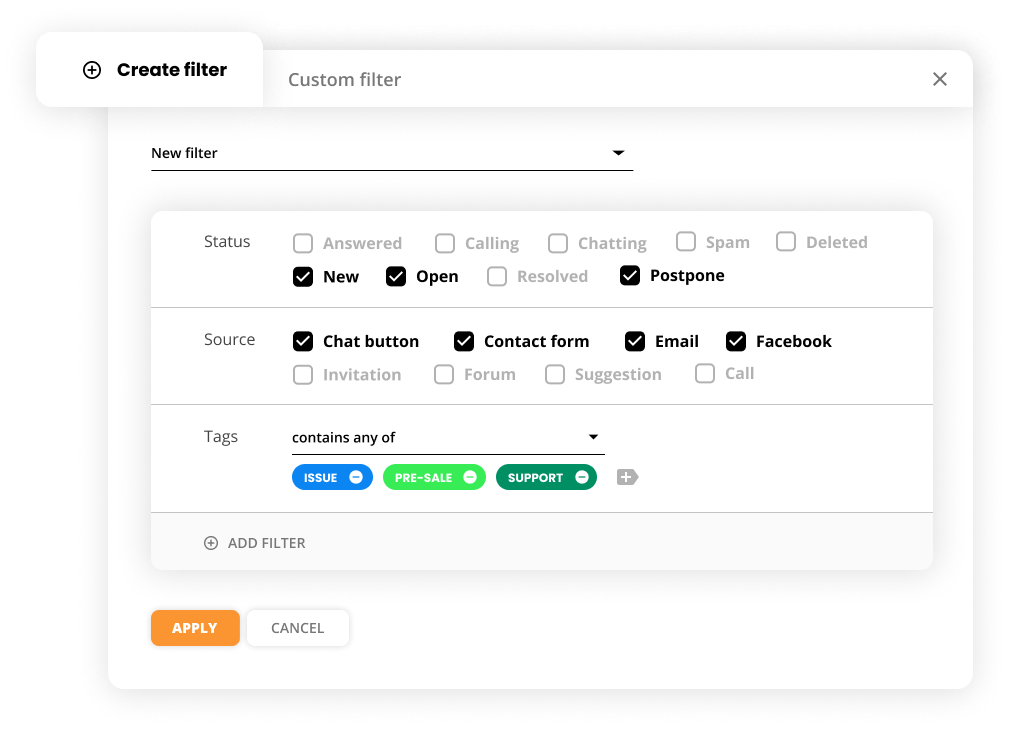
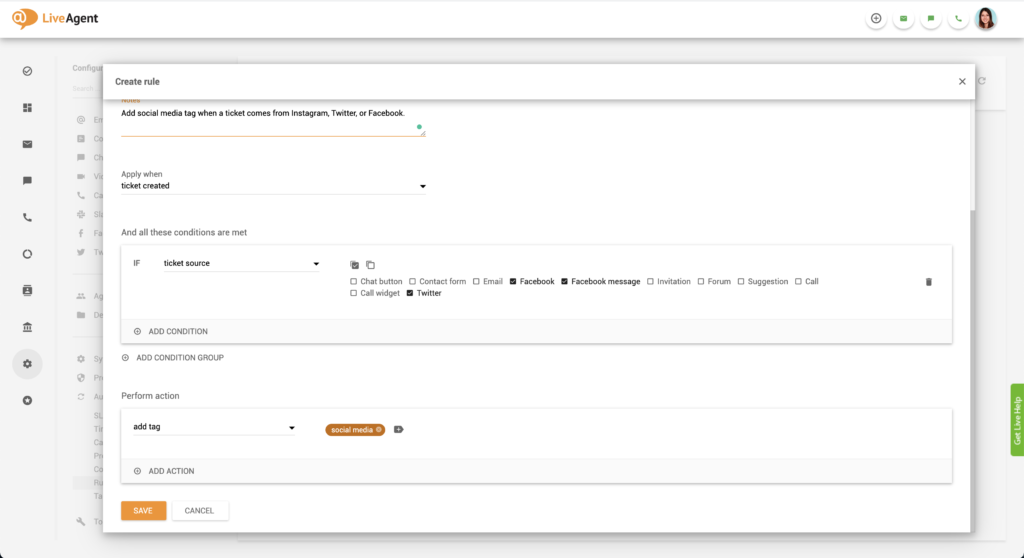
You can set up an automation rule that will automatically assign the “sales” or “pre-sales” tag to any ticket that contains the words “billing” or “pricing”.
You can assign a “Twitter” tag to every ticket that’s from Twitter to make it easier to find inside your help desk. Alternatively, you can create an ‘urgent" tag as well to help you filter out urgent tickets from Twitter.
The system can automatically assign a dedicated department tag such as “marketing” or “IT support” based on the department the ticket is assigned to. Assigning tags in this manner can clearly showcase who’s responsible for solving each ticket.
As a LiveAgent user, you can:
Tags can bring organization and clarity to your ticketing tool. By implementing ticket tags, you bring an element of organization and clarity to your IT ticketing tool. These tags enable support agents to easily categorize and prioritize tickets, thereby improving efficiency and response times. Having an organized help desk can benefit you in many ways, mainly by improving agent efficiency which also improves response times, the quality of your customer service, customer satisfaction, and eventually sales and MRR (monthly recurring revenue).
Adding tags to tickets ensures that your agents can find them quickly. This improves agent efficiency and productivity and enables them to focus on solving tickets instead of wasting time looking for them.
The less time agents have to spend figuring out what tickets to solve and where to find them, the faster they can answer pending tickets. This of course improves response times and the quality of your customer service which then impacts customer satisfaction and retention.
The better service you provide, the happier your customers are. If you continuously provide exceptional service, they will have no reason to churn. They’ll keep coming back and become loyal customers to your business. This, in turn, will improve your sales and MRR as lifetime customer value increases alongside customer loyalty.

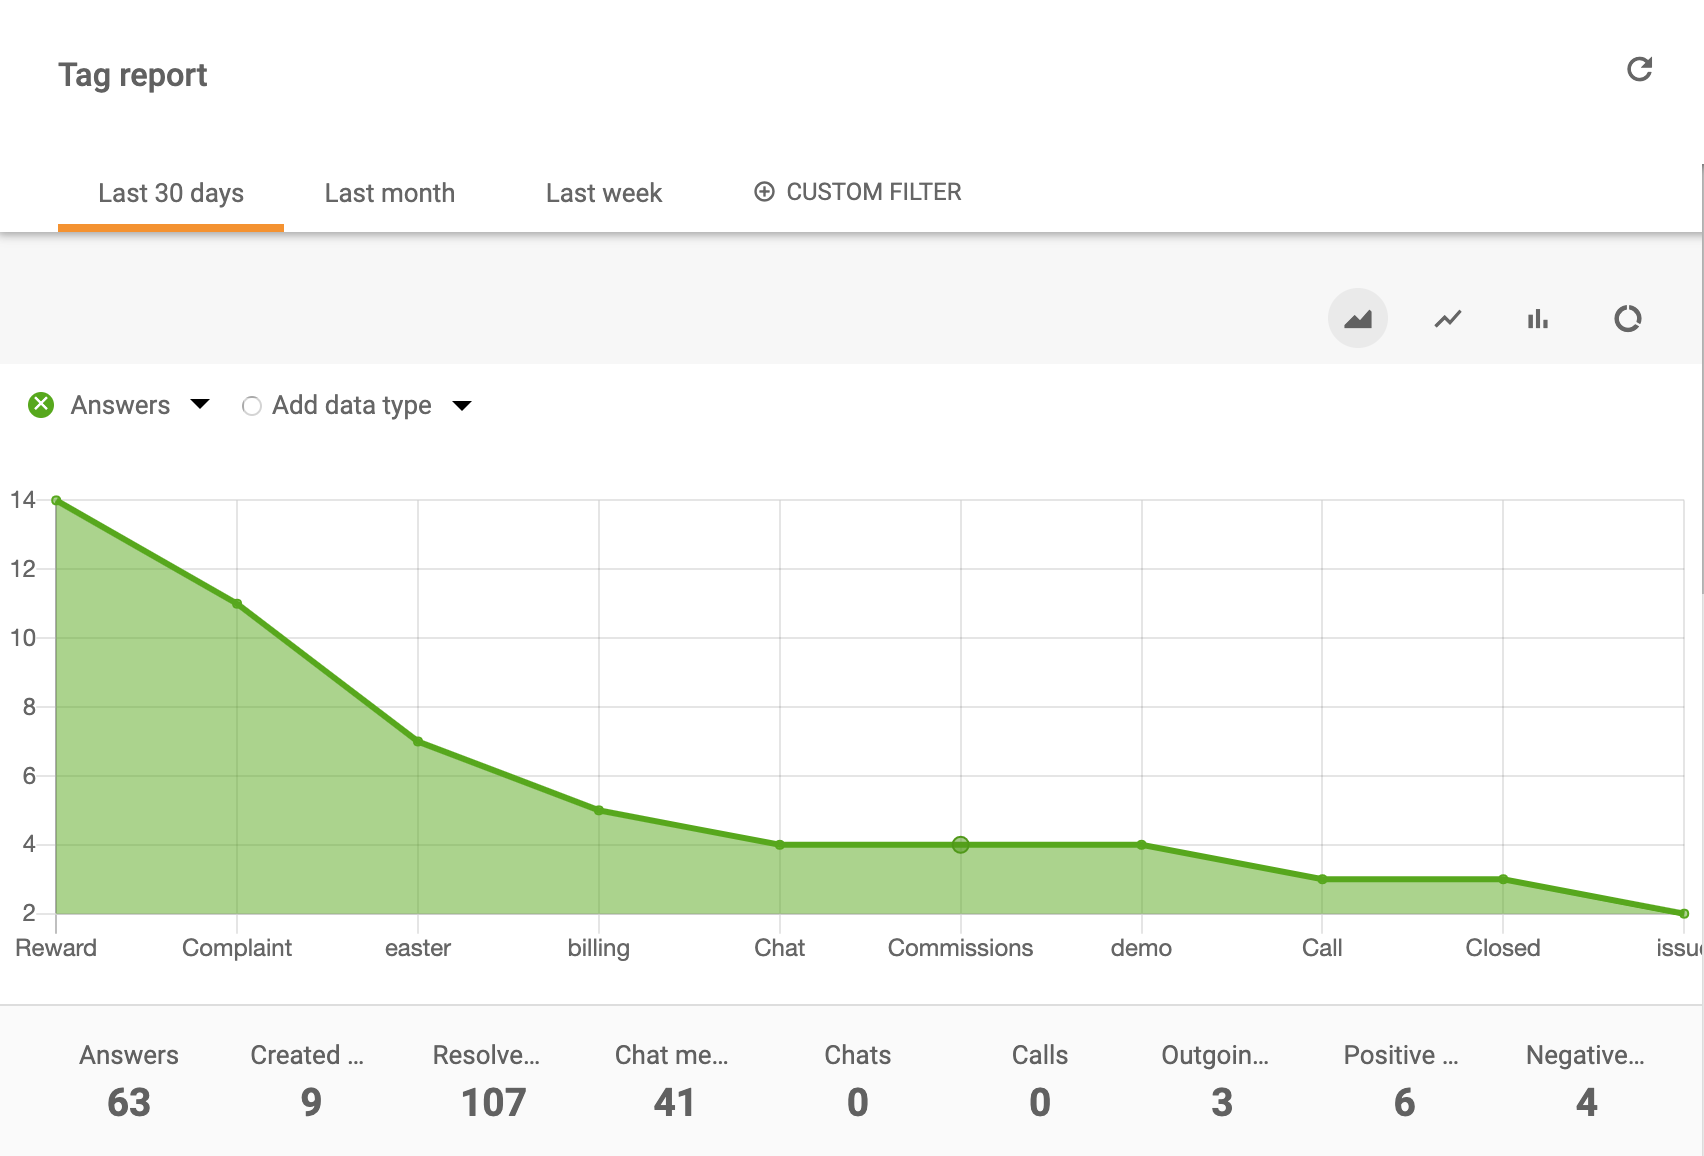
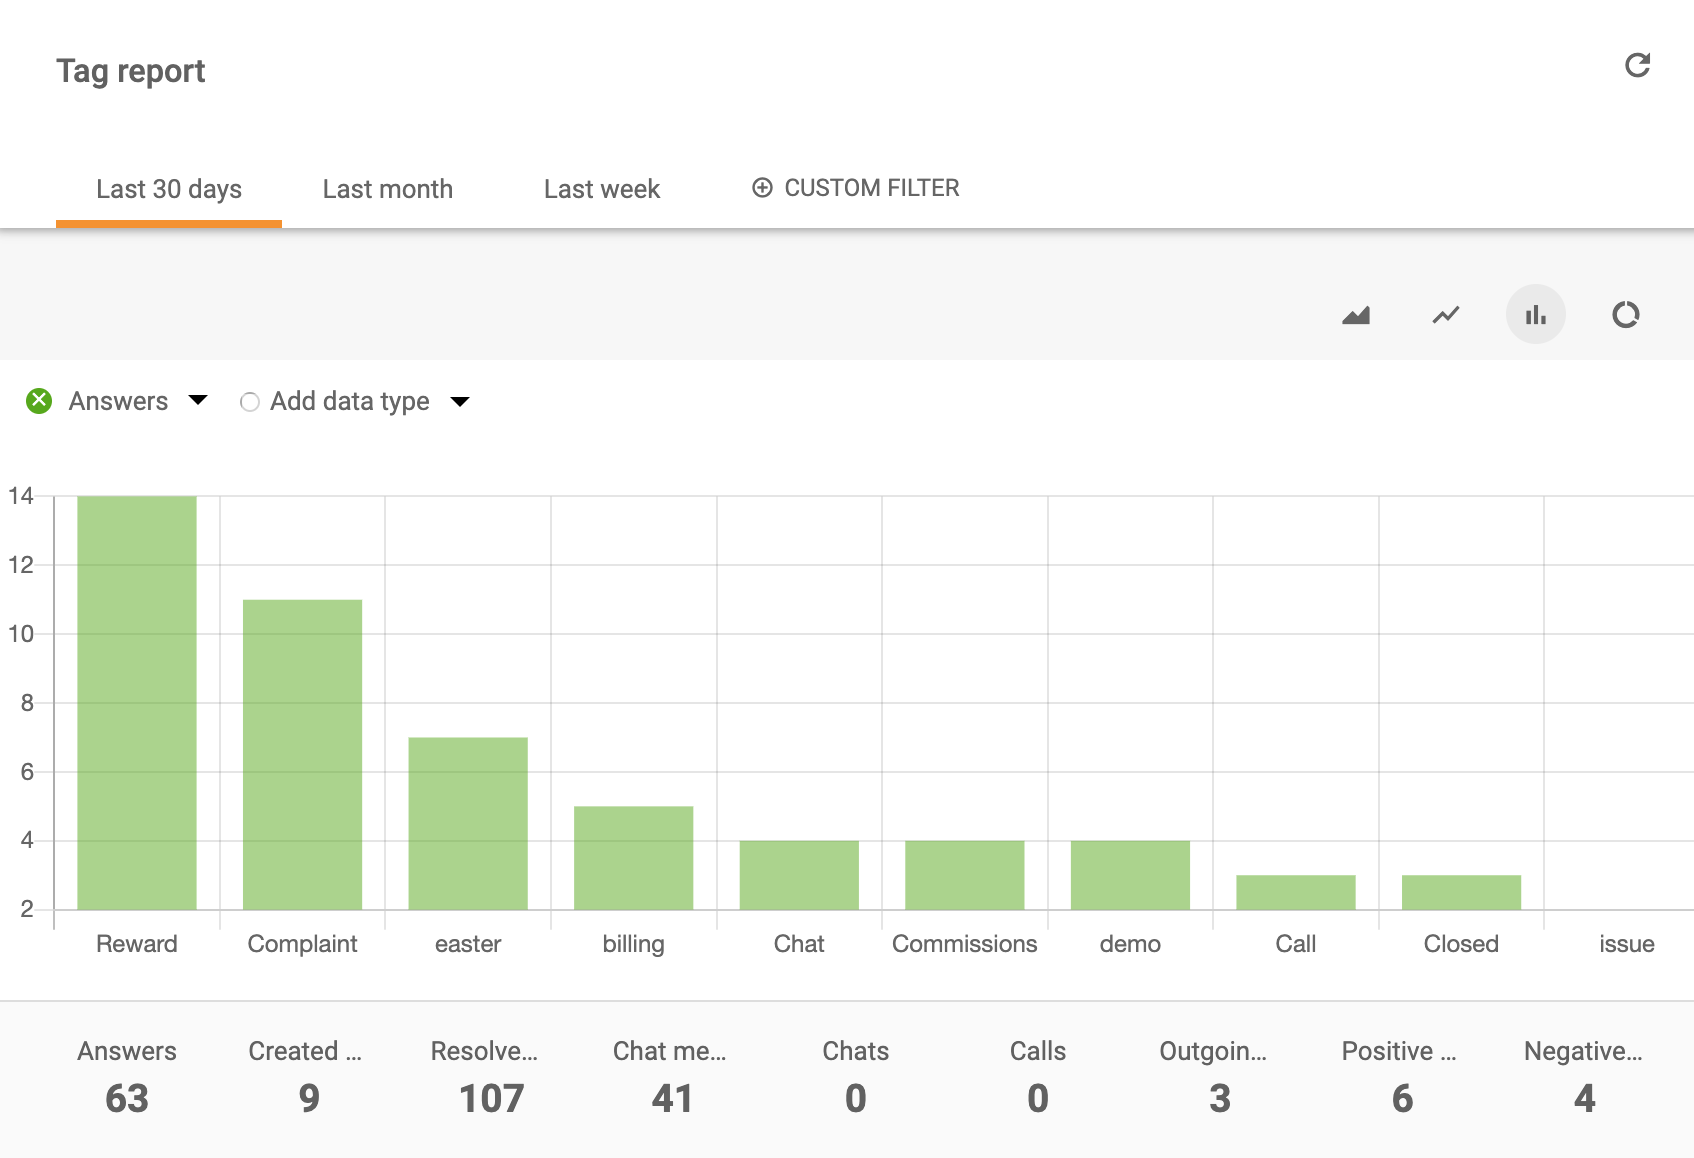
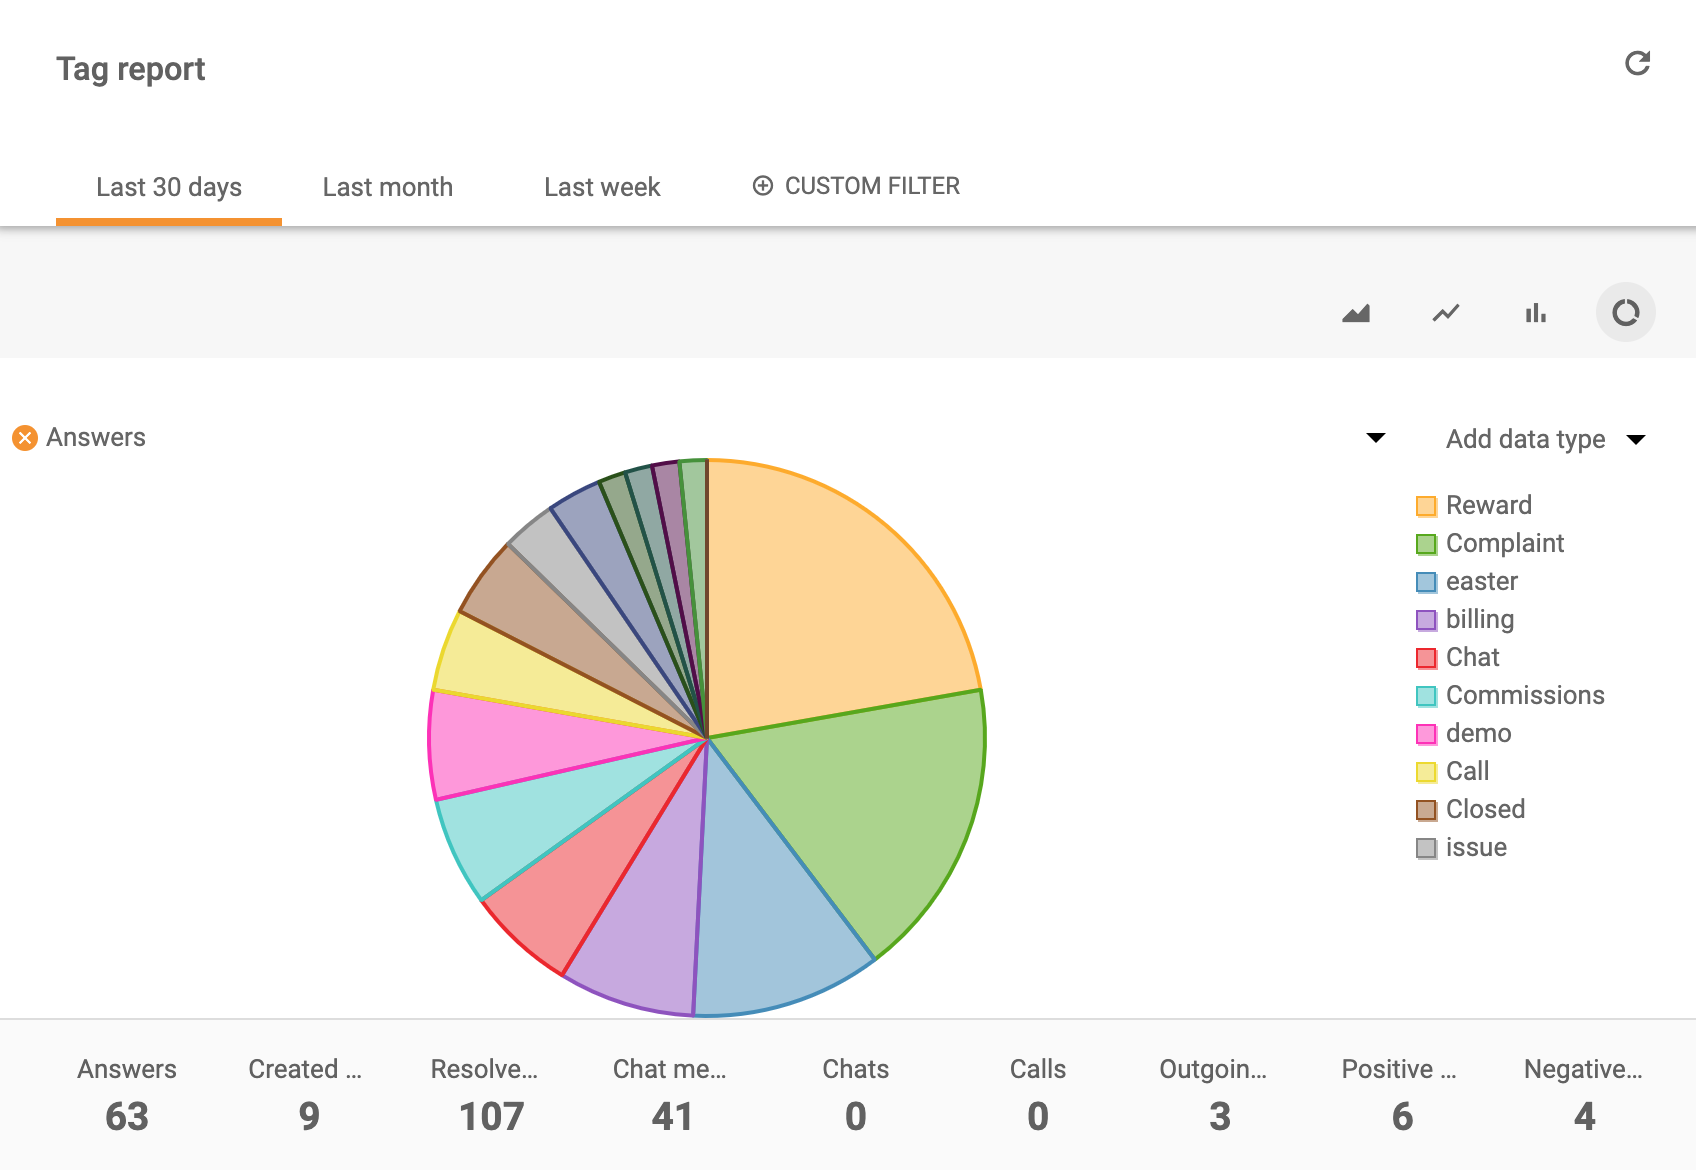
If you want to gain insights about what types of tickets your agents spend the most time on solving, you can take a closer look with our tag reports feature. You can generate tag reports by day, week, month, year, or from a specific time range. Individual entries can be sorted by time range, department, channel, and agent. All tag reports can be exported into a CSV file, to make it easier to share with upper management.
You can generate tag reports in multiple formats including:

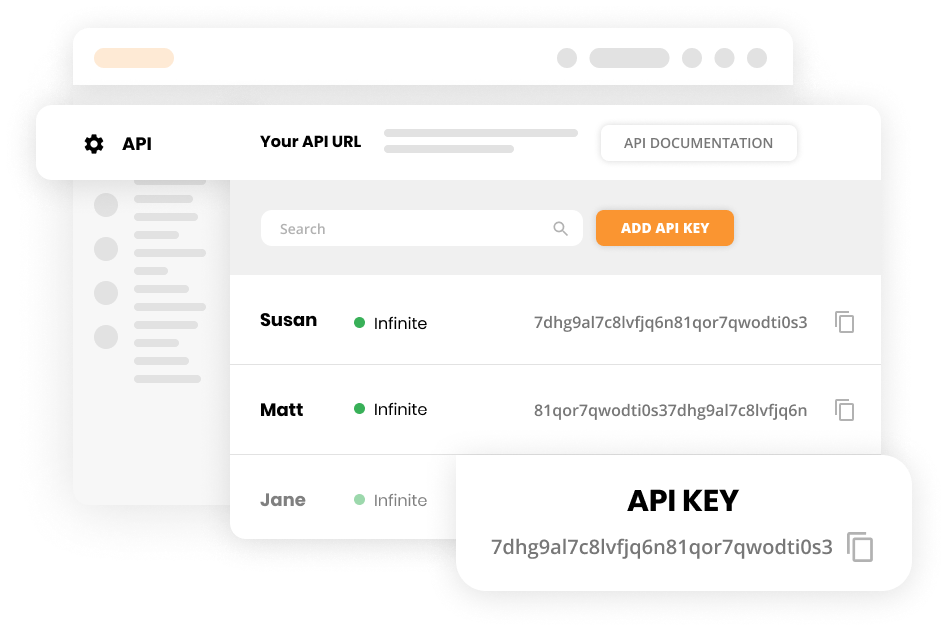
Check out the following link to learn more about LiveAgent REST API and call values from tag reports.
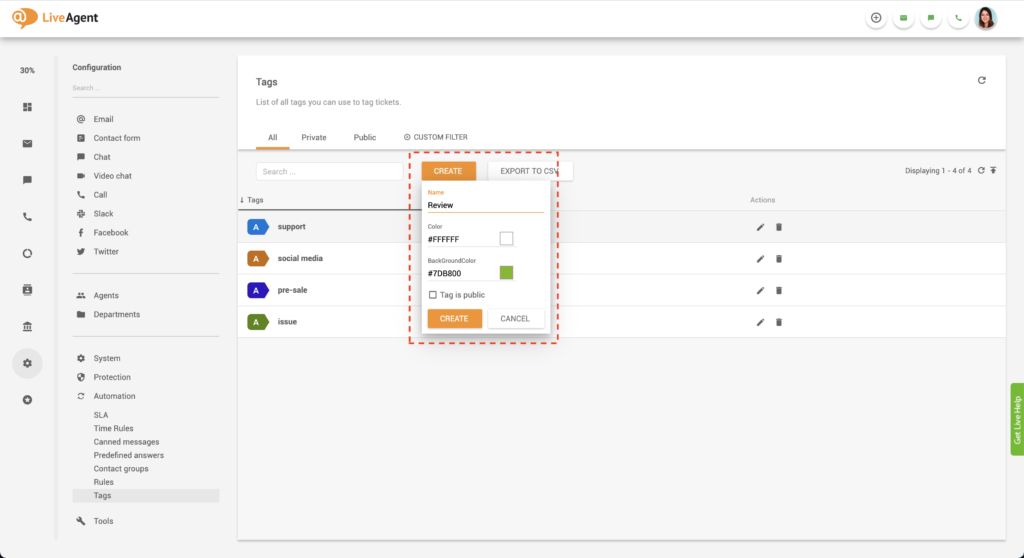
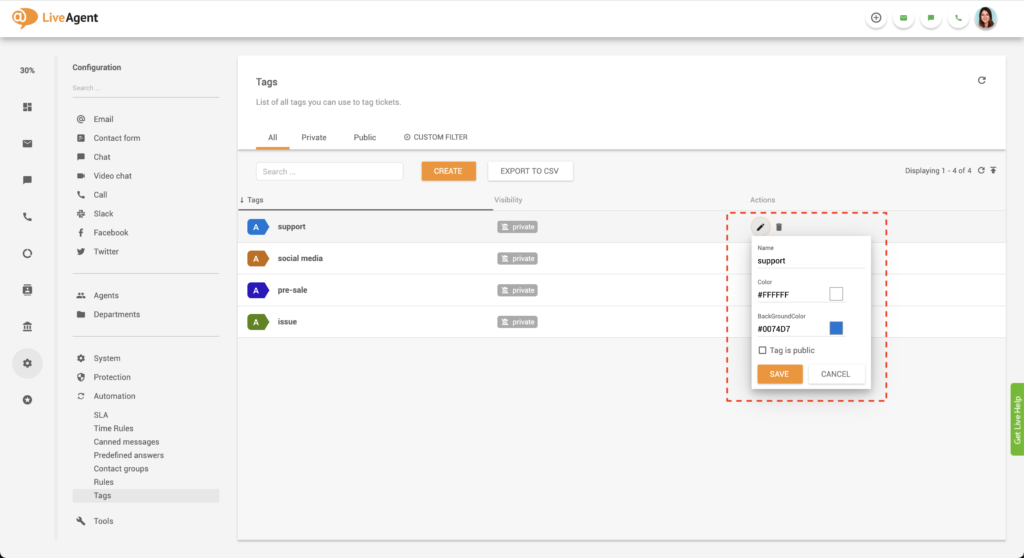
When creating a tag you can modify it’s:
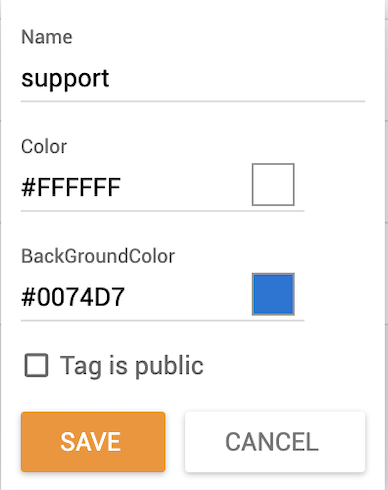
These modifications can be made at any time, so if you want to edit a tag’s name or color, you can do so.
To learn more about tags check out our knowledge base articles and guides:
Organize your help desk with custom tags starting today. Ease your workload by leaving the heavy lifting to us, so you can focus on serving your customers. With automated tag assignments, it’s easy. Try it today with our free 30-day trial . No credit card required. No strings attached.
Discover LiveAgent's powerful features that streamline communication, increase efficiency, and boost customer satisfaction.
LiveAgent's Tag Reports enhance support workflows by using tags to categorize tickets and create custom reports. Features include call tagging, customizable but...

Ticketing filters in LiveAgent help you quickly locate specific tickets by applying settings and rules to search queries. Enhance your ticket management and str...

Learn how LiveAgent's unique Ticket ID system streamlines customer support by organizing, prioritizing, and managing inquiries efficiently.
Join our community of happy clients and provide excellent customer support with LiveAgent.